Chapter 1 – Mission 1
After the concert, you control Rikku and Paine as they square off with the Yuna look-alike named ????. Fight the two Goons she has with here and give her a few licks for good measure. When all three are defeated she will high tail it down the corridor. Defeat the few goons and she-Goons that appear and eventually you will come to a short fat guy named Ormi with a shield and a tall skinny gun slinger named Logos. Take them both out and then the fake Yuna will appear again.
Boss: LeBlanc
After a transformation, the fake Yuna becomes the scantily clad Leblanc and you will need to take her out. When the battle starts you will now have access to the dress sphere as well. Use L1 and select the SongStress. Now you will be able to use the Dark Dance against her. LeBlanc isn’t hard to defeat at all if you have Yuna using the Dark Dance and Rikku and Paine hacking away at her.
After you beat her Yuna will dance for a bit more and the mission will be complete.
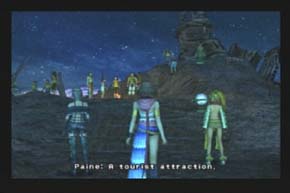
Mission 2 – Mt. Gagazet
After a short scene between Yuna and the ships crew, you are back in control of her and are free to wander around the Celsius.
On the Celsius
Talk to each person as you come across them. When you talk to Buddy and Brother you get Al Bhed Primer XXI key item. Leave the bridge by going up the stairs at the back wall and use the Save Sphere to save your game. Go to the end of the hall and enter the elevator. Go to each floor including the Cabin to buy and sell at the bar and the Engine Room to get some Ether, Remedy x3, Potion x4 and Phoenix Down x4. Remember to check these chests throughout the game for more goodies. When you have gone to each floor, come back to the bridge and talk to Rikku at the front and Brother beside her. You will get the Al Bhed Primer XIX, III and XVII key items.
Since we are still waiting for Buddy to analyze where the next sphere is, I had to go take a nap in the Cabin before the scene triggered. Do so and when you exit the Cabin afterwards the alarm will sound and you will be required to head to the bridge. A scene will play and you will be off to Mt. Gagazet to reclaim a treasure sphere from the ruins there.
To Mt. Gagazet
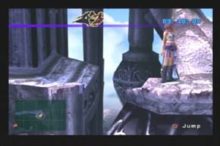
When you land a short scene will play and you will go through a few jumping tutorials. Hop down and grab the Yellow Ring from the chest and jump back up and across the ledge. Make your way down the stairs on the right to a save sphere at the bottom. Save and had left to the square tile there. Press the glowing button and the lift will lower. Hop off the lift and drop down a few ledges.
Look on the map and you will see a red arrow. That’s where you are headed. When you reach the bottom ledge, make your way up the other side until you reach the top. When you are finally on top, some old friends show up, LeBlanc, Logos and Ormi.
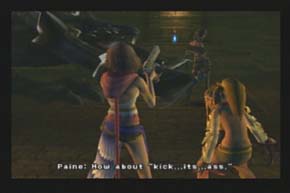
LeBlanc, Logos and Ormi
You will get to fight all three at once this time around so gang up on LeBlanc to start with and then take out the two lesser thugs. Use sword attacks and the warrior dress sphere to take them out as quick as possible. After all three have been defeated you will need to race them to the top of the ruins.

Start by going right, over the gap and then hop down the ledge instead of going up the leaning column. Jump over the next gap and keep running towards the door opening. When you get there Logos will appear and send a few goons to attack you. Take them out and enter the door way. Make your way through the temple and down into the first gap to grab the White Ring from the treasure chest there. Hop out and continue through over the gaps and jumping from block to block. Don’t worry if the enemies are too far ahead, you will catch up to them soon enough. When you get back outside, follow the walkway around to the left and you will run into Ormi at the end.
He will send a few Recoils to get you but they are easily taken care of. After the scene that shows the top, take a step back onto the narrow bridge and jump across to the block to the right. Follow the blocks up to a walkway. Follow it all the way around behind the ruins to a treasure chest that holds a Star Pendant. Go back around to where you came up and hop over to the block on the right. Again, follow them upwards and you will come to a save sphere and the enemies that you were chasing. Save and grab the Muscle Belt from the chest near the bad guys. Head up the stairs and get ready to square off against Boris.
Boss: Boris
Funny name for a giant spider. Boris is not too hard to defeat at all. Use the warrior dresssphere and have everyone attack with flametongue. It does some heavy damage to Boris and he won’t last long when 2 of the 3 girls are hitting him with it. After he is defeated, the girls claim their prize and the mission ends.
Mission 3 – Besaid Island
Before you talk to Shinra, run across Brother who is lying on the ground a few times to hear him yell for some fun. When you are ready, talk to Shinra and he will tell you about the treasure sphere. Turns out that you can use it as a dress sphere called Black Mage. After his conversation Buddy will alert the crew that the info on other treasure sphere has come in and he has two located, one at Besaid Island and one at the Zanarkand Ruins. When you are ready, talk to Buddy and go to the Besaid Island since it is the easier of the two.
Yuna’s Return to Besaid Island
When you land on Besaid Island, make your way left and north to enter the village. When you get there a scene will play between the girls and Wakka. Seems Yuna hasn’t been home in a long time and the people of her village miss her.
As soon as you are done talking to Wakka, enter the middle hut on the right side and talk to Lulu, Wakka’s wife. Talk to her and Lulu and Yuna will go for a walk. They will have a short conversation about her previous efforts and how she is still looking for more treasure spheres. After the conversation, take a walk around the village and enter some huts. The shop is on the left side and if you speak to the shop keep she will tell you she has a rare key for sale, but you won’t have enough money. They key is needed to open a chest in the temple at the far end of the village, but when you come back later, the shop keep will tell you someone already bought the key and was headed for the caves up north.
Head to Lulu’s hut across from the shop and she will ask you if you want to stay the night. Say yes and you will go sleepies. When you awake, talk to Lulu outside and she will tell you that Wakka went to investigate some caves and is worried about him. This will start a mission to find Wakka. You will need to walk around the town and talk to certain people to get the 4 digit cipher to enter the cave. The kid with the dog running around the village gives you this clue, “The Ciphers hidden by the shore are numbers two and three of four” and Jassu in the Lodge gives you this clue, “The Cipher easiest to see belongs before the other three”. Everyone else tells you to check out the ruins so that’s where you’re going next!
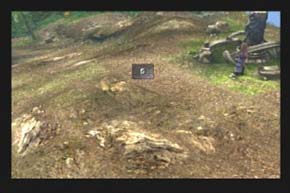
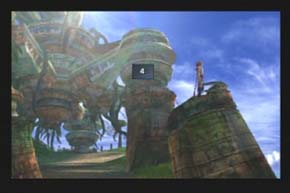
Make your way back where you entered the Island. Save at the sphere and head right up the hill and follow the path. At the top of the hill there will be some broken machinery with a sparkle spot on it. When Yuna looks at it, there is a 6 which is one of the ciphers. Continue along the path and the next screen will have the path continuing under a large metal structure. Before you go under it, there are two metal objects on either side of the path. On your map will be another purple dot to tell you where the cipher is. The left side object will have a blue circle on it, but the right side you can climb up onto and get the second cipher digit that is an 8 from on top of it.
Continue along the path and you will eventually pass over wooden bridges and waterfalls where the next area will be a split that can go south or west. There is also a set of stairs to the east of the area that has a switch on the metal wall which is actually a door. That’s what you’ll be using the cipher code for when you have them all, but for now ignore it. Head south to the beach and enter the area. When you do you’ll get a strange call from Buddy. Look on the map and you’ll see a purple square. To the left of where you enter will be some kids playing. Go as far left as you can and you will see a ledge where a kid is.
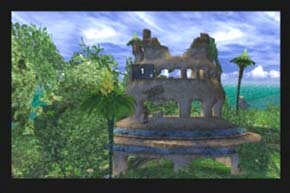
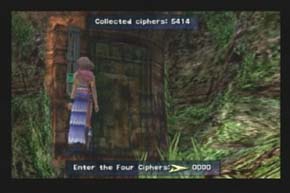
Jump up there and climb up the building until you reach the sparkling object. Look at it for another cipher digit which is a 9. Hop back down and enter the open beach area and make your way to the boat house in the left corner. Look at the map and you’ll see another purple square. Jump up on the edge of the wall to pull yourself up and over to the structure hidden by the bushes. Look at it and you will get the last cipher, another Number 9. Make your way back up to the metal door and enter the code 6998 to open the door and enter the cave.
When you get inside you will find Wakka just sitting on the ground. A scene will play and he will tell you he isn’t sure if he wants to know what is in the cave. You do, so head north across and jump across some stones to reach a save sphere. Save and then head a few steps north to the glowing blue sphere stand. As Yuna grab the sphere, the protector appears behind the party.
Boss: Red Dragon
The dragon will come out swinging and he does some pretty hefty damage right off the bat. Have one person heal while the other two use cold attack such as Ice Blade. Cold attacks do the most damage to the dragon and as long as you have one person healing the party with potions you will kick his flaming butt in no time. When you beat him, the sphere is yours for the taking and you will be rewarded with the White Mage Dress sphere which one of the most used through the game.
Head back to the entrance to the cave where Wakka was and still is sitting. A long scene will play with him talking about the sphere that he wanted to find. After a call from Buddy, the mission will be complete and you will have the Besaid Sphere key item and the Protection Halo garment grid.
Mission 4 – Zanarkland Ruins
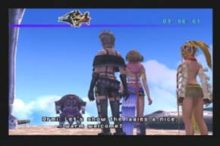
Now that you are back aboard the Celsius, save your game and then go and talk to Buddy. Next stop with be the Zanarkland Ruins. When you land the mission starts and you need to be the first one to reach the sphere. Talk to each person gathered around the fire and Issaru will be at the top. Have a conversation with him and then head to the left of the screen and make your way to the ruins.
Zanarkland Ruins
As you enter the doorway some goons will close in behind you and a scene will play with some kids saying the clue was “key”. Continue forward and follow the kids as they run through the ruins.
You will probably have to fight a battle or two, but you will eventually catch up to the kids and they will start a conversation with you. After they leave, continue around the walkway and you will come to a lone goon. Get close to him and a scene will play with him asking what the clue was. He will say it was “mon” and a battle will start. Kick their asses and make your way up the ramp to another walkway. Follow it and you will come to another goon. Answer him and either answer results in a fight. Continue along the path until you finally enter a hallway with people and a large set of stairs. Follow them up and down the passage to the left at the end to a large room.
In the center of the room is a lift that will take you to the chamber of Fayth and the kids are in the west corner jumping up and down. Hop on the lift and you will be taken down. Use the save crystal and head through the door way to talk to Cid. After you talk to him and his friend, head north to the door that the monkeys were in front of and you will be able to go through it now. Continue along the hallway into a room with 6 treasure chests. Grab the elixirs and potions and head up the stairs to the door. Go through and walk to the center of the room to start a scene. When you are asked the Meaning of Life, pick the last selection and you will eventually receive the Heart Reborn Garment Grid. When you are done talking, head down the stairs at the north end and follow the corridor around until you eventually come to the sphere stand.
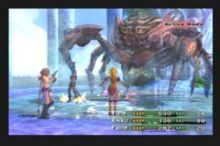
Boss: Guardian Beast
This big fella can be pretty tough so make sure you have one person on the healing job either using potions or the much easier way, using cure from the white mage dresssphere. This big guy just needs a lot of solid whacks and not a lot of fancy magic attacks. The damage that they do to him isn’t worth the extra wait time, so just use regular attacks on him.
When he starts getting close to death he will use an attack called the Damocles Photon which will just about knock each characters life in half. Make sure they get healed back up quickly and continue to pound on him. He may use it again depending on how long it takes you to defeat him but he will eventually fall. For your troubles you receive a fragmented sphere and an amulet.

Mission 5 – Kilika Forest
When you are back aboard the Celsius, Buddy will tell you that they have just discovered an “awesome sphere” located at Kilika Forest. Check the map when you talk to him and make your way down there.
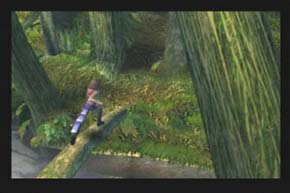
Kilika Forest
Save your game at the sphere when you land and make your way down the dock where you will run into Tobli and some of his friends as he tells you about a show. Make your way north when they are done talking and you will come to another area. You can explore the first area of the docks if you like and open the chests along the upper walkways.
In the next area go up the stairs directly in front of you and enter the hut to the left to talk with Dona as Barthello runs off. Head up to the second floor and grab the 1500Gil out of the chest and leave the hut. Make your way back down the stairs and proceed to the end of the dock where the guards will open the gate to let you through. After a long scene with Nooj about the sphere the mission begins. You are to head through the forest through the check points and enter the temple to get the sphere. Easy enough right? Make your way north and into the next screen
When you get there, ahead of you, Nooj and his band will be talking to some guards. There will be two large stones just ahead where you are standing. Grab a squatter Monkey from behind the left stone as you hear it start to squeak as you walk past it. Grab it and then head down the left path way. When you are going down there you will have a choice of going north or going west all the way and then going north again. Take the first path and grab the Squatter monkey behind the tree on the left as you walk past. Head over the fallen tree and you will have a choice of going north, east or west. Follow the path north and around the corner. You will hear another monkey squeaking as you run past. Grab him behind the tree to the south of you and continue along the path going east now.
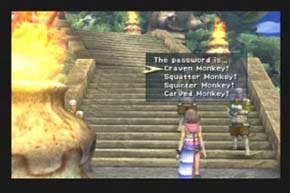
When you come to an intersection, head north again and when you reach the end you will hear voices and have a choice of what you want to do. Take a peek through and you’ll see a scene between the guards about the password. If the number of guards is odd the password is carved monkey, if the number of guards is even, the password is “craven monkey”. When you are done grab the squatter monkey from behind the rock and head south and then east to the white square on the map. Save your game at the sphere and then talk to the guards. There will be 4 guards so you know the pass word will be “Craven Monkey”. Make your way up the stairs and the last bunch o guards will try to trick you but the password is still “Carved Monkey” after more soldiers appear. When the soldiers take off, you get Turbo Ether and a Menace of the Deep Garment Grid.
Make your way to the open area where a few people are standing and watch the scene. When it is over, the boss fight starts.
Boss: YSLS -Zero
Time to go to town on this giant robots head. He really isn’t all that tough and normal attacks do as much damage as sword break attacks. Use the normal attacks since they are much quicker to charge up and make sure you have one girl using White Mage and healing with Cure or Cura. When the girls’ magic is low, use an Elixir or Ether and continue healing each girl as they need it. Zero has two main attacks that he uses, the Blast Punch and Haymaker. The Blast Punch will take off about half your life so be on the look out for it and get ready to heal right after. When the YSLS is defeated, you will get the sphere, a wristband and will finish the first chapter.