Chapter 2
When you are back in control of Yuna, go to the bridge and talk to Shinra about the sphere. It will show you a short scene of what the sphere holds. When it stops playing, go and talk to Brother and you will receive the Al Bhed Primer XXII. Another scene plays while Brother freaks out and says he wants to give the sphere back. As you exit the bridge to get changed, Brother says that he picked up some hitchhikers. Ride the elevator up to the Cabin and head down the hall to meet them. Talk to all of them and the last one will ask if you want to hear them play. Tell them you are singing tonight and the barkeep will enter the hall. Talk to him and he will ask you to push them into the elevator. Tell them you can push all night and then push each member into the elevator. When all three are all the way in the elevator a long scene will play.
When you wake up head down to the engine room to raid the treasure chests and then back to the bridge and talk to Brother. He will ask you where you want to go and you will have a choice of either Mushroom Rock Road or Bevelle. Pick either since they will both lead you back to the ship eventually after a long scene. When you get the call to go back to the Celsius it turns out that Leblanc and her thugs stole the fragmented sphere and left you Leblanc’s sphere. Now the mission starts to get three of Leblanc’s syndicates costumes to disguise yourself to get into Leblanc’s mansion.
Head up to the bridge and talk to Buddy. He will tell you that there are no leads on the uniforms but Guadosalam will appear as a new hotspot on the map. Make that your next stop.
Mission 1 – Guadosalam
Walk around the area and talk to everyone you see. None of the guards will let you enter the mansion and a few people will mention that some guards have gone off to the Djose Highroads and a desert. Head back to the ship and pick which place you want to go.
Since Djose is the easiest, let’s go there first.
Djose Highroads
 When you get there, there will be a line up of people on the right and a few people mulling about the area. Talk to the people as the line will eventually get shorter. When the line is gone, enter the small hut and talk to the person inside. Tell him you want to dig and he will give you access to the temple. Exit the hut and enter the main doors in front of the temple. When you enter, Gippal will talk to you and you will get the Al Bhed Primer IV. Head out of the temple and south of where you entered the area.
Talk to Gippal on the bridge and a scene will play where he tells you to give a Letter of Introduction to a woman in the Bikanel Desert. When he is done talking, grab the potions out of the chest and continue south along the bridge. Talk to the people along the way and they will tell you some oddly dressed people are ahead of you. When you come to the split in the path with some goons hanging out, go west and you will come across some girl guards talking about the mission sphere. A mission starts here to grab the sphere and their costumes.
Continue along the path that you are still on and eventually you will come across a sphere lying behind a rock. It is Yuna’s special dresssphere “Floral Fallal” and the Unerring Path Garment Grid. When you turn around, Ormi and Logos have returned along with a female Goon. Fight them and defeat them to receive the Syndicate Uniform.
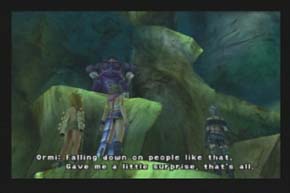
Boss: Ormi
Use the same strategy that you’ve executed in earlier fights. You shouldn’t have any trouble here.After the fight, continue on into this secret area. Near the save point there’s a room with an accessory, so grab that before moving on. Once you have done that, hang a right and then straight into the room ahead of you. Grab the sphere in this room to get a Crimson Sphere, and be prepared to fight once more.
Boss: Leblanc Syndicate Ormi & Logos
This fight will be the toughest one you’ll have to go through with these clowns, but you can run into some trouble here if you’re not careful. Take out Logos first because he has the lowest HP and an instant kill ability with Roulette. By taking him out, you also negate Leblanc Syndicate’s ability to use their delta attack. Once you have taken out Logos, take out Leblanc herself and then Ormi, since his attacks are the weakest out of the three.
Bikanel Desert
 Now that you are back aboard the Celsius, save your game and stock up on any supplies you may need. When you are ready, go talk to Buddy and pick the Bikanel Desert Hotspot to travel to. When you reach the desert head to right a few steps and talk to Nhadala. Show her the letter and she will tell you to go talk to the pilot who is to the left of her. After you talk to him once, talk to him again and he will ask where you want to go. Select the Oasis and the mission starts.
When you reach the Oasis, walk forward and you will come to a sphere lying in the sand. Pick it up and it will be Rikku’s “Machina Maw” special dresssphere. When you get it another battle will start with two Fem-Goons this time and Logos. This battle is a lot easier then the battle you just had with Ormi and Logos since Ormi is not present.
Boss: Logos
These goons don’t learn, do they? Again, change one character into Songstress and use Darkness Dance. Have your two other characters take out the 2 female soldiers since they’re unaffected by darkness.
When the three are defeated you will receive another Syndicate uniform and the Hour of Need Garment Grid as well. After the battle you will be back aboard the Celsius with one more destination to grab a uniform.
Mt. Gagazet
Next stop is to return to Mt. Gagazet. When you land on it, talk to Kimarhi and he will tell you that he has looked all over for a sphere but couldn’t find it, although there was one place he didn’t look, the Scar of Fayth and there are signs of other sphere hunters around. That would be the third uniform we want. The quick and easy way up the mountain is to take the teleporter to the mountain trail and follow the path upwards to the red arrow on the map. Talk to the man there and continue along the path through the area with columns lines up to the next red arrow. When you make your way around the corner you will see a Fem-Goon hopping up the mountain and the mission to get her uniform will start.


Start climbing up the ledges and enter the cave on the right. Follow the tunnel around and across the stones to another cave opening. Continue your way up some more ledges and you will see the Fem-Goon just ahead of you. Instead of following her, go up the ledges and make your way to the right when you reach the top. Walk through an opening and the girls will be above the Fem-Goons below. Ormi will interrupt the girls and all three will rush off when the ledge you are on collapses. You grab a uniform they left behind and are ready to head back to the Celsius.
Make your way down the path and save at the sphere. Take a few more steps down the path and the girl goons will appear wanting the uniform back. Take them out and head up the next few ledges to run into Ormi. Defeat him the same way you have in the past and that will end the mission.
Boss: Ormi
This is another easy boss battle, and much like your other run-ins with the Leblanc Syndicate, you can choose the Songstress job and use Darkness Dance to greatly decrease the amount of damage dealt here.
Beat Ormi and you get your uniform and another Garment Grid.
Mission 2 – Return to Guadosalam
Now that you have all three uniforms, you will be able to sneak into Leblanc’s mansion undetected and get the sphere. Make your way to Guadosalam and walk up to the red door to start a scene. Change your clothes to the uniforms and enter the mansion to start the mission. After the scene, Leblanc will go up the stairs. Enter the door right beside you and Logos and Ormi will tell you to go up to Leblanc’s “chambre”. When you get there you will need to satisfy Leblanc until she falls asleep. When she does, Logos and Ormi enter and tell you to check the switch in the living room. Go down the stairs to the room there were in previously.

Walk to the back of the room and beside the left door will be a panel with a switch in it. When they press it, the secret passage is revealed and they change back to their regular clothes. Take a few steps forward and Ormi will appear again. Fight him and a Goon and continue down the hall. Save at the sphere and enter the door ahead of you to get Heady Perfume from the chest. Exit the room and continue going east through the hall. At the end of the hall you will come to another room which holds the sphere. Pick it up and watch it and you will have the Crimson Sphere 10. After you watch the sphere movie, Logos and Ormi enter and you have to fight them for the billionth time.
After you defeat them, they run away as an alarm is going off telling you that the booby traps have been set. Head North when you exit the room and follow the hallway to a corridor with a dead end and gaps that you can jump into that have switches on the walls. In the first gap will be switch #2. Press it and then head to the next gap which will have switch #3. After you press those, hop back up and head to the end of the hallway. Some spikes will pop out from the wall and come towards you. Do nothing and let the spikes come. A scene will start and you will appear in another hallway where switch #1 is directly to your left. Press it and hop down through the opening. (I ran away from the spikes the first time and I could not get back up into the hallway where the #1 switch was again. I had to restart a saved game, so let the spikes come at you and don’t move when they do).
Go to the end of the hall where the spikes came out of and there will be a switch on the wall. Press it and an opening will appear to the left. Head through the new hallway and you will come to a large round door. Head east to save your game before heading through the door. When you are ready, enter the round door and square off against guess who.
Boss: Leblanc, Logos and Ormi
The three of these together can be pretty bad news this time around. They still use their same attacks but ganging up on you makes it seem that much more powerful. Use a special sphere here if you need to at least to take out one of the three syndicates. When one of them is no more the other two are much easier to deal with.
Either Logos or Ormi should be first to go. Ormi does the most damage, but Logos will kill your status with his Russian roulette attack. Pick one to gang up on and make sure you have a white mage to keep up with the healing. If you are having troubles hitting Logos, I always used the Trigger Happy attack on him and it never seemed to miss. After Logos and Ormi have been defeated, turn all your attention on to Leblanc. With the three of you pounding on her, she isn’t difficult to beat at all.
After she is finished off, a scene starts and explains the broken sphere and where you are off to next.
Mission 3 – Bevelle
Now the girls are off to Bevelle with the syndicate in tow. When you land there will be a scene. After it is over the mission starts and you are off to find the Vegnagun under the streets. Talk to the old man on the right and he will ask you if you want to use the lift. Say yes and it will take you to another part of Bevelle. Go north on the map and then west. Enter the door with the blue lights around it and you will be inside where there are more than a few people mulling about. Talk to them and they will tell you to be careful of the soldiers since the praetor is missing.
Go into the hallway on the east side and enter the room there. Hop up on the altar and you will see a door will open. Head out into the main room and this time go down the west hallway. In this room you will see the door that opened and can hop up into the opening. Do so and there will be two lift controllers in here. Operate the right one and it will tell you the destination of the central lift has changed. Go back out into the main room and go directly north to hop in the lift. Instead of going up, this time it will take you down.
After a short scene, make your way long the walkway going north, west, north up the ramp and then, east to another lift. When you get off it, make your way east to an Antechamber and a save sphere. Save and talk to the Hypello if you need to and grab the chocobo feather from the treasure chest before you enter the door way. When you are ready, enter and the three girls will hop down a hole to the ruins below. When you land, apparently the Syndicate was always with you and they will cover the exit as you move.
Head all the way west and there will be a console there that will tell you to disable the security manually. To do so, you will need to activate the blue towers and not the red ones. Go all the way to the east and Yuna will hop on a chain and slide down to the platform below.
When you land, two large robots known as Yac-13’s arrive and fight you. They aren’t tough at all and regular attacks with warrior spheres will take them out as long as you have one girl as a White Mage praying. Now you will need to disable the security at the towers with the blue lights in front of it. Walk up to each of the three towers with the blue lights and you will have to battle an YSLS-Zero. If you go up to a tower with out the blue lights you will have to battle an YSLS-99. Neither of them are all that tough especially if you use Rikku’s special sphere Machina Maw. When you activate the third and final blue tower, Precepts Guard will emerge from the opening in the center of the room and attack.
Using Yuna’s Special Sphere or Rikku’s special sphere Machina Maw and the guard is easy as pie but only the party member whose special sphere you are using will get the experience points from the battle. You may have to heal once or twice but that should be about it for the battle. For the first part of the battle he can be a bugger since he likes to cast Death to kill off a member quickly. Other than that, he really isn’t too tough other than his Demi attack which will nail everyone for roughly 300. If you don’t want to use the special sphere, have two warriors and one white mage. Have the mage cast shell and protect and have the two warriors hack and slash at him. Heal when needed and the precept will eventually fall.
Each time you light up a red light tower, you will be in a battle with a YSLS-99 and at the third and final tower you will face Georapella. As long as you have Reflect handy, he is another push over. He always attacks with elemental spells which are easily reflected back at him. If you don’t have a White Mage that has learned in then you may be in a bit of trouble since it loves to cast these spells at you over and over. If you haven’t gotten reflect just yet, I would recommend leveling up a bit before you take him on.
In the main area of the room there is a pit with ledges that appear after each tower is beaten. There are also two opening down in the middle that you can enter. To get to the bottom opening it takes a long time and a lot of battles.
You need to light up the red towers and then fight at the Blue Towers to move the ledges over. Each battle will move a ledge over one space, so to move the very bottom ledge, you will have to light up the red tower to the right of the blue tower with the broken chain behind it, and then fight the Precepts Guard 5 times to move the ledge to the bottom opening. To move each ledge into position, you need to light up a red tower and fight the blue tower beside it until the ledge is in place where you want it. Like I said, it takes a very long time to get all 6 ledges into position and all you will receive from the bottom opening is a ribbon accessory which stops all abnormal statuses on one character.
When the first three ledges are in place, hop down and enter. If you like, before you enter the opening you can climb up the chain that you slid down at the start and make your way back up to the save sphere and save your game. I would suggest doing that and also checking out the rest of the chains behind the other towers in the room. Some other ledges hold chests as well as other robots to battle. Also if you like, you can hang out in this chamber and keep on fighting the precept guards and Georapella’s to gain level rather quickly. When you are ready, hop down the ledges in the middle of the room and enter the first opening. Follow the hallway around and over the blocks. Pop open the chests for ether and other goodies and make a right at the next hallway. Follow it to the open gap and step on the edge at the middle. The block will turn and a lift will appear. Hop on and go to the other side. Go to the end of the hall and outside to open the chest.
Head back in, across on the lift and down the hall to the left side where you went right earlier. Follow the hallway around until you come to a gap that you can’t cross and two pillars on each side. Climb one side and the pillar will drop a bit. Climb the other side and it will drop a bit more. Hop across to the ledge that should be in reach now and follow the walkway to the end. After the scene plays, make your way to the right and pass Logos and Ormi to a chest that contains some Phoenix Downs. Head down the walkway just before it to enter a corridor.
When you get to the end, there will be a wall of pillars that fall away and reveal 3 lifts. Take the left lift and you’ll be in a room with a chest and a lift at the far end. Also in the room are two blocks you can climb on top of to active a bridge to the lift. Climb on both blocks and head for the passage directly south from the block that is farthest from the lift. There will be two more lifts there. Take the right side lift and it will raise you up to where you just were. Hop down the center south passage again and this time ride the middle lift back up to the top. Now go to the right and take the middle lift there. That will take you up to another block that you can climb on. Do so and you will see some pillars rise.
Head back on the lift to get back down into the room with the two blocks and head for the passage to the left. Hop on the lift there and it will take you to another lift in the center. Jump on it and it will take you to another block you can climb on. This switch will rise up more pillars. Head back down the lift to the main room and then onto the lift at the far end. When you get off, there will be a save sphere there to use. Do so and you will see where the pillars were that raised. Hop over them to get the treasure chest that holds the Dark Knight Dresssphere. This dresssphere hold some heavy fire power that you will need later on during the game. Use this sphere often and build up its abilities. Make your way back up to the main path and follow it across to the other side. A short scene plays and you will end up fighting Baralia.
Boss: Baralia
He, just like many of the enemies so far seems to be a lot tougher then they really are. He will heal himself a lot as you continue to kick his ass, but as long as you have shell and protect cast on yourselves, which you should start every fight with, then he won’t take any time at all to beat. Keep your mage casting prayer while the other two use warrior or Dark Knight to slice and dice him up. If he uses his attack to rob your mage of all her magic, have her quickly change to another sphere and continue to let him have it. When he is dead, Paine takes off around the corner and you are to follow her. Enter the next room and another scene plays with the end boss for the mission.
Boss: Bahamut
Well there doesn’t seem to be a Vegnagun here but there sure is a huge ass Aeon to deal with. He can sure take a beating as well as give it so get set in for a long fight. Have the White Mage cast Shell and protect right off the bat and have the Dark Knight warriors casting darkness against him. It sure does seem to do a lot of damage but it robs you of life as well. If that isn’t your style and don’t want to give up the health points and just want to use normal warrior, then armor break seemed to do the most damage to him until you run out of MP. He has two major attacks that he uses, Impulse and Mega Flare. Impulse actually seems to do the same amount of damage as Mega Flare, but the flare is a lot more intimidating and gives you a countdown as to when he is going to launch it against you. Keep the mage praying and casting cura when someone gets really low but that will probably only happen four or five times during the entire battle. Don’t let up on Bahamut and he will eventually fall to end the second chapter.