Chapter 5
Head to the bridge and talk to Buddy. When you look at the map, almost every destination has a hotspot lit up on it. Since they are just side missions, go talk to Brother and pick your destination of which hole you want to jump into. Anyone that you choose will take you to the hole and you will have to fight the same monsters but different destinations have different ways of following the path to get there.
The first choice Brother gives you is the most straight forward path. When you get to the far plane, walk along the stone path and you will come to a large flat platform. Land on it and you will be embroiled in a battle with Shiva.
Boss: Shiva
Shiva is by far the toughest monster that you have had to face so far. Her attacks are brutal like the Heavenly Strike and Diamond Dust which will obliterate your Hp. Have a white mage with you casting healing non stop. You are going to need it. If you have her cast Reflect on the party, then when Shiva casts Blizzaga on you, it will reflect back and heal her, but with the same token, it won’t hurt you.
Have your two warriors using any flame attacks they have such as FlameTongue and that will start to chunk off a good part of her 14,800 hp of life. Half way through the battle I had to switch to Machina Maw and start to kick her ass with that. Mind you, at this point in the game I was only at level 27 and had to use the special spheres a few times. If you aren’t up around 30-35 then this battle will be pretty tough, but not as tough as the next battle.
Shiva didn’t like me switching to Machina Maw one bit but it did the job and Shiva was no more after a few Varja attacks. Once Shiva is defeated, a save sphere will appear for you to save at.
Before going any farther into the game, I decided to do some leveling up here. I would stay next to the save sphere and run around with the lure bracelet on to attract monsters. After fighting them, I would use the save sphere to heal and then run around some more. This was a quick and easy way to level up. When you are ready, follow the path some more and the next flat platform you come to will have three boss enemies to fight.
Boss: Mindy, Sandy, Cindy
When these three appear you better be up around 40-50 levels. I wasn’t even close to that and kept having my ass handed to me because of their Delta Break attack where all three of them gang up on you and will obliterate your party down to 1hp each.
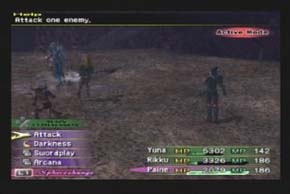
To beat these three bugs, take out Mindy first since she has the least hp and having one of the three dead will stop them from casting the Delta Break attack. When one is dead then the other two will have roughly the same amount of health to start with. Using a white Mage and two Dark Knights with their Darkness or Black Sky attacks will make this battle go a lot smoother.
Have the white mage cast shell and protect to start will and have her keep an eye on the health through out the battle. Again, to make this battle manageable, take out Mindy before they use the Delta Break attack and then it’s easy sailing from then on.
After the battle with the three bugs girls, continue along the rock path until you come to the final flat platform and a rather gruesome looking boss.
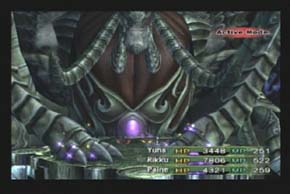
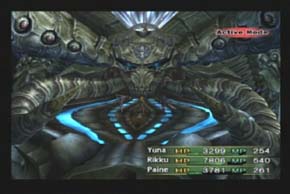
Boss: Anima
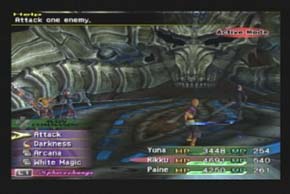
As you step up to Anima, you will notice that he is wrapped in chains and is not a nice looking fellow at all and his attacks aren’t much nicer. He has three main attacks but for some reason he didn’t seem to attack a lot. He would make an attack and then sit there for more than a few rounds while you hacked away at him and healed until he came around and started to give you another devastating attack.
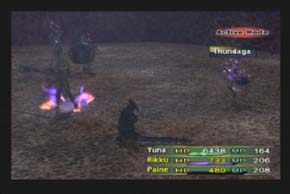
His attack of Pain nails a person in your party with every status ailment there is but is easily cured with a white mage spell Esuna. He also has Oblivion which is an attack that will nail each character for about 1600 hp. Like I said, after each attack he just sat there for a long time and gave you plenty of time to heal up and start attacking him again. Have the girls in the usual White mage and two Dark Knights. Use Darkness and Black Sky if you have it, if not, Darkness should work fine.
After you defeat Anima, you will come to a field where Leblanc and her crew will be waiting. Watch the scene and the portal will open for you to walk through. Before you head through, you can buy some potions off Leblanc if you want. Head through the portal and you will come to the heart of the Farplane.
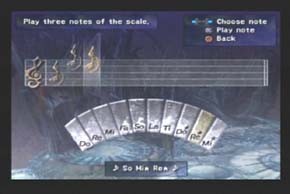
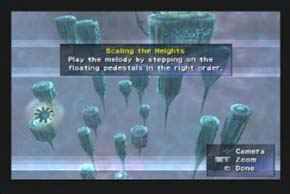
When you reach the Farplane, there will be a path that you are on with Electrical barriers along the way. Before you go anywhere, there is an organ to the left of you will a blue platform with circles on it. When you step on these, it will play music notes that you will need to repeat when you go to the organ. The Notes you need to play when you get to the organ will appear at the bottom of the screen if you have stepped on each blue plate to reveal the notes. For the first organ is it only three notes and each of those notes, So, Me* and Ra* are played on the first plate. When all the notes for each organ are played, the gate at the arch along the pathway will dissolve and allow you to pass without a fight.

If you do not want to find the notes for the organs, then you will have to fight the guardian known as Azi Dahaka at each gate. This guy is a tough mofo and is definitely not worth fighting unless you are serious prepared. They have over 140,000 hp and they can swipe 1000 hp per round from you. It is best to play the notes and avoid these guys at all cost. After you play the first organ, you will bring down a gateway. Now ahead of you will be three paths, one going left and right and one going up the middle. The organ will be on the far right path along with the final notes. Head up the left path and get the notes Do* and Ti there. Avoid the electricity barriers and the red beams by jumping over them. The middle path will have the note La and directly right of that note and under the path will be So. Follow the path up to the organ and play the notes.
When the gate goes down, run through it and there will be more paths to explore. The left path will have the notes Fa. Make your way up the right path and jump off the side to the right when you pass the first electrical barrier. Grab the note Fa there and follow the path along to SO and Do. You will then drop back down and are able to run for the organ up the right side of path. After you play the notes and the gate goes down, back track to the fork in the path and go up the left side. Make your way along until the next scene plays.
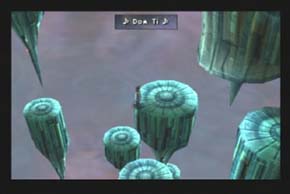
This next part is a long puzzle game was such a pain in the ass that the game makers should be shot for it. To get through without having to fight another Azi Dahaka jump on the platform to the left and ride the stone up. Hop over to the right and the notes So, Me* and Ra* are played. Go to the next stone on the right and you will go for another ride. From here hop across to the small stone and then the stone on the right to hear Do* and Ti. Make your way back down to the save sphere the same way to got up there and this time take the platform to the right of it. Ride the platform to the next one which will be to your left and up a bit. When you jump on it, it will zoom across to a larger platform. Hop over to it and it will play La. Once again make your way all the way back down to the save sphere and hop on the platform to the left. Ride it until it stops and then jump left and then north to go for a lift up. Jump right and you will hear So. Jump back to the left where you just were and it will take you up some more.
Jump over to the platform with the chest and open it to get two Mega-Phoenix. Head north to the platform there to hear Fa and Mi. Jump back to the chest platform and left to the platform there to go for a ride down. Jump to the platform to the south of you and then jump back onto the platform you just jumped off of to go for a ride back up. Jump left and then south and you will hear the note Fa. Jump south and to the right two platforms and you will be able to reach the Save Sphere. Do so and then hit the platform to the right of the sphere.
Ride it up to the two platforms and hop on the lower one, not the platform you jumped on earlier. Ride it up to a larger platform which will play So and Do when you step on it. From there hop over to the left to the main platform and it will play the notes you picked up in order. If you did it correctly, you will pass through the gates with no quarrel. If you messed up the notes, well you’re in for a tough fight with the Azi Dahaka. After you play the right notes, the gate will fall and you can pass through. Head down to the save sphere below before you go ahead and save. After you save, head back up and pass through the gate and follow the path to the end. After a really long scene, you are in the final show down with Vegnagun. Everyone splits up and decides to take out a part of its body. The girls get to tackle the tail.
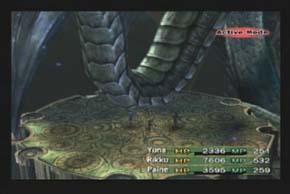
Boss: Tail
As soon as the battle starts have your white mage cast protect and shell on the party to keep the damage from the tail to a minimum. The tail only has two attacks that it does, Sweep and a laser from the tip of its tail. The sweep will hit each party member for some hefty damage around 1000 each but if you are leveled highly, that won’t matter much.
Have your white mage heal as soon as you are hurt and have the two Dark Knights use attack on the tail. There really is no need for darkness or any other fancy attack since the regular swipe does a good job. Eventually the tail will fall and the battle will end.
After the next scene, you see that Leblanc and crew need some help with the legs. Before you head up the path to help them, make your way back down the path to the save sphere. Get healed, save and then make your way up the path to go help them.
Boss: Legs
When attacking the leg, there are three orbs high on top of it that attack you as well. Ignore them and focus on the leg. Have your white mage cast shell and protect and the two dark knights attack the leg. The leg is really weak and won’t take long at all to kill.
After the leg is toast, again run back and save your game at the sphere before venturing forward to the body.
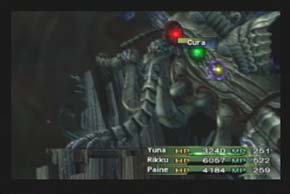
Boss: Body
The body is the torso of the Vegnagun along with the Bulwarks or arms on each side. This is another battle that really isn’t all that tough. The two arms have 3000 hp each and it is in your best interest to only attack Vegnagun when they are both dead.
This is the pattern I used. Destroy both arms and then attack Vegnagun until it has brought back one arm to life. The arm will attack you, so as soon as it does, destroy it and attack vegnagun again until it brings back another arm. The main vegnagun has a killer attack that it needs to charge up for but it can only use the move while it has both arms.
I just kept repeating that pattern and killed him eventually with little damage. Each time the arm attacks you after being brought back to life, it will hit one girl for about 1500 life but have the mage heal that and it shouldn’t slow you down at all.
Done yet? Of course not.
Boss: Head
When attacking the head, it has two horn like tusks on either side of it head like the arms of the body you just fought. The easiest way to fight this battle is to use Darkness to take out the tusks quickly and then continue using darkness or regular sword swipes on the head.
After a few attacks, the head with bring back another tusk but since they only have 2500 hp they really aren’t a threat. There are only a few attacks that the head and tusks do but none of them are devastating in any way. As long as you have you white mage healing every round, this battle is another that you should be able to zip through.
Final Boss: Shuyin
Finally, the last last last boss. I always thought that in games the bosses were supposed to get tougher the farther you went in the game. These final bosses are nothing compared to some of those Aeons you had to face earlier. To start cast shell and protect on your party since mostly all of Shuyins attacks are physical. He has a few attacks but the Terror of Zanarkland is probably the most damaging.
He will hit one person more than a few times for about 200- 300 each hit. It usually ends up doing about 2500-3000 damage. His other moves are Spin cut which does about 450 to one player and Hit and Run where he runs around hitting everyone in no particular order. Again, as usual, have the white mage casting healing every round. The two dark knights should be casting Black Sky on Shuyin to beat down his Hp.
When you run out of magic use an ether potion to get the magic back up and continue to rain down the sky on him. You can use regular sword attacks but it will take twice as long to defeat him but the difficulty will still be the same.
Eventually Shuyin will fall and the end game cinematic will start. Sit back and watch the really long ending movie.