Chapter 4: Melmond
Recommended Level: 7 to 14
Treasures:
- Earth Cave L1: 1975 G, 795 G, Pure, Heal, 880 G
- Earth Cave L2: Wooden Shield, 5000 G, 575 G, Coral sword, 300 G
- Earth Cave L3: Tent, Heal, 3400 G, 1020 G, Ruby
- Earth Cave L4: 3400 G, 1520 G, 5450 G, 1455 G, Wooden staff, Cabin, 1250 G, Silver shield
- Titan’s Tunnel: Silver Helmet, 420 G, 620 G, Great Axe
Recommended Equipment:
- Fighters: Silver Sword, Iron Armor, Some helmet.
- Red Mage: Rune Sword, Iron Armor, Cap.
Now that you pretty much have everything you can get in the game, it’s time to continue on with the story. First, make good use of the new canal and head west to the town of Melmond.
Melmond
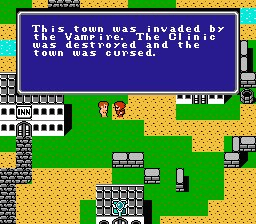 Upon arrival, you will find out that the town has been attacked by the oh-so terrible Vampire. Please note that this town does not have a clinic nor does it have an item shop.
The only things here worth buying are CUR3 and FIR3. Having these two spells will really make the game easier later on. Unfortunately, they do cost 16,000 G, but you should have that much money. If you don’t, fight, gain money, and level up!
Make good use of the Inn and head for the Earth Cave to show that Vampire who boss!
Earth Cave
The road to the Earth Cave is very simple – head west from Melmond and then go south once you get the chance. Afterwards, you will see the cave to the east of you (Check the world map if you have any troubles). Save using a Tent before you enter.
Earth Cave Floor 1
There are 4 possible paths: the west path leads to the Hall of Giants – a place where you will battle with Giants on every step. I suggest you avoid this place for now. To the north, there is a treasure chest with 1975 G. If you take the southeast path, you’ll come to a fork in the road. The right path leads to a treasure chest with 795 G and another chest with Pure. The left path has a couple more chests guarded by an Earth. These contain a Heal potion and 880 G. The east path contains a stairway to Floor 2.
Earth Cave Floor 2
This floor is pretty much divided up in many smaller, room-like sections.
There are two rooms with treasure on this floor. To get to the first room (from the stairs), go down, up, down, down, down, right, down, down, down, down, down, and check the chests (you’ll be attacked by an Earth upon entering) for a Wooden shield, 575 G, and 5000 G.
From where you are right now, the way to the next room is simple: Up, Up, Up, Up, Up, Up, Right and, check the room for a Coral Sword (change the Were Sword for this), Cabin, and 330 G. Continuing on, head straight down until you see the stairs to Floor 3.
Earth Cave Floor 3
Note that the enemies have gotten a little harder than before. Instead of fighting every enemy, it is suggested that you start running away if you meet groups larger than 6. If you meet Cocatrices, run immediately since they can stone you. To get all the treasure from this floor, head right and get the Tent in the chrst. Next, head straight up, right, and down to pick up the Heal potion that is guarded by an Earth. Then go back up and head left this time. Pick up the 3400 G from the room above you (guarded by an Earth) on the way. Keep on heading left, down, right, and check the room for 1020 G (guarded by an Earth). Afterwards, head right. Heal before you enter the room – you have a fight coming up with the Vampire himself.
Vampire
Just use physical attacks and you’ll be OK. He has very low HP, so he’s not really a problem…
After killing the Vampire, check the treasure chest for a Ruby and head out of the Earth Cave the same way you got in.
Titan’s Tunnel
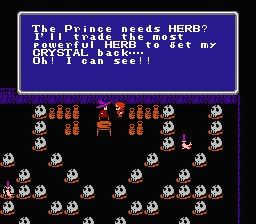
Now that you have the Ruby, head for Titan’s Tunnel, which is north-west of the Earth Cave. Feed the Titan the Ruby and collect the treasure from his cave: Silver Helmet, 420 G, 620 G, and Great Axe. After you are done abusing the Titan, go to Sarda’s Cave and get the Rod from him.
At this point, I suggest you head back to Melmond and then to Coneria to restock on your 99 Heal Potions. Use the Inn at Melmond and go back to the Earth Cave. Proceed to Floor 3 and use the Rod to open the passage to Floor 4.
Back to Earth Cave
Earth Cave Floor 4
There are only two rooms with treasures here – simply head straight up and then left to check the first room: 3400 G (guarded by Ogres), 1520 G, 5450 G (guarded by Sphinxes), 1455 G, and a Wooden Staff (guarded by Ogres). From there, head back right and then left/downwards. It doesn’t really matter which way you go, just aim for the top-left corner of the floor. Once you get there, get the last of the Earth Cave treasure by heading all the way down. You’ll get a Cabin (guarded by Ogres), 1250 G (guarded by Ogres), and a Silver Shield (equip it now!). Afterwards, head back up and use the stairs to get to Earth Cave’s Floor 5.
Earth Cave Floor 5
Not much to do here. No treasure; just a boss. Head straight up, then left, and then down. Heal yourself and enter the room. I was at LV13 at this point, but you can defeat this boss at LV8 if you got all the treasures I told you about.
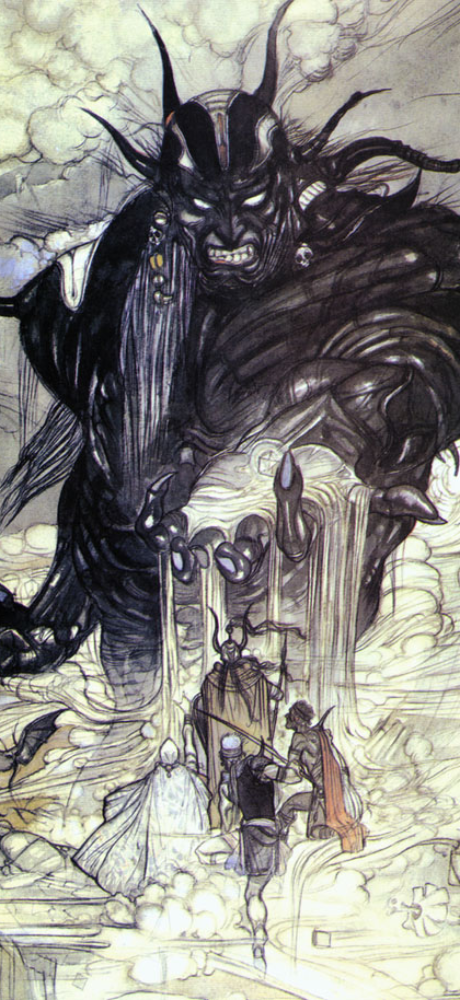
???
Make good use of the FAST spell at the beginning of the battle (use it on your fighters, especially the one with the Silver Sword). Then keep on attacking. Eventually, he’ll die. Not too difficult, although I was at a very high level (LV13).
After you have beaten the Lich, simply walk on the altar in front of you. One of the ORBs will be lit (as shown in the picture). Take one step forward and you will be warped out of the Earth Cave. Head back to Melmond and rest at the inn. Proceed to Chapter 5!